Flashing gateware and Linux image#
Todo
This is the hard way! Special cables and FlashPros are not required when using the firmware we initially ship on the board. This tutorial should be rescripted as how to _unbrick_ your board. Also, we have other work-arounds using software and GPIOs rather than FlashPros. Let’s not put this in user’s face as the experience when it is far more painful than using the change-gateware.sh script and “hold BOOT button when applying power” solutions we’ve created!
In this tutorial we are going to learn to flash the gateware image
to FPGA and sdcard.image to eMMC storage.
Important
Additional hardware required:
Programming & Debug tools installation#
To flash a gateware image to your BeagleV-Fire board you will require a FlashPro5/6 and FlashPro Express (FPExpress) tool which comes pre-installed as part of Libero SoC Design Suite. A standalone FlashPro Express tool is also available with MicroChip’s Programming and Debug Tools package, which we are going to use for this tutorial. Below are the steps to install the software:
Download the zip for your operating system from Programming and Debug Tools page.
Unzip the file and in the unzipped folder you will find
launch_installer.shandProgram_Debug_v2023.1.bin.Execute the
launch_installer.shscript to start the installation procedure.
[lorforlinux@fedora Program_Debug_v2023.1_lin] $ ./launch_installer.sh

No additional packages to install for installer usage

Requirement search complete.

See /tmp/check_req_installer608695.log for information.

Launch of installer
Preparing to install
Extracting the JRE from the installer archive...
Unpacking the JRE...
Note
It’s recommended to install under home/user/microchip for linux users.
Enabling non-root user to access FlashPro#
Download
60-openocd.rulesCopy udev rule
sudo cp 60-openocd.rules /etc/udev/rules.dTrigger udevadm using
sudo udevadm triggeror reboot the PC for the changes to take effect
Flashing gateware image#
Note
content below is valid for beta testers only.
Launch FPExpress#
Download
FlashProExpress.zipfile and unzip, it contains the*.jobfile which we need to create a new project in FPExpress.Open up a terminal and go to
/home/user/microchip/Program_Debug_v202X.Y/Program_Debug_Tool/binwhich includes FPExpress tool.Execute
./FPExpressin terminal to start FlashPro Express software.
Create new project#
Important
Make sure you have your FlashPro5/6 connected before you create a new project.
Press CTRL+N to create a file and you will see a pop-up window like shown below,
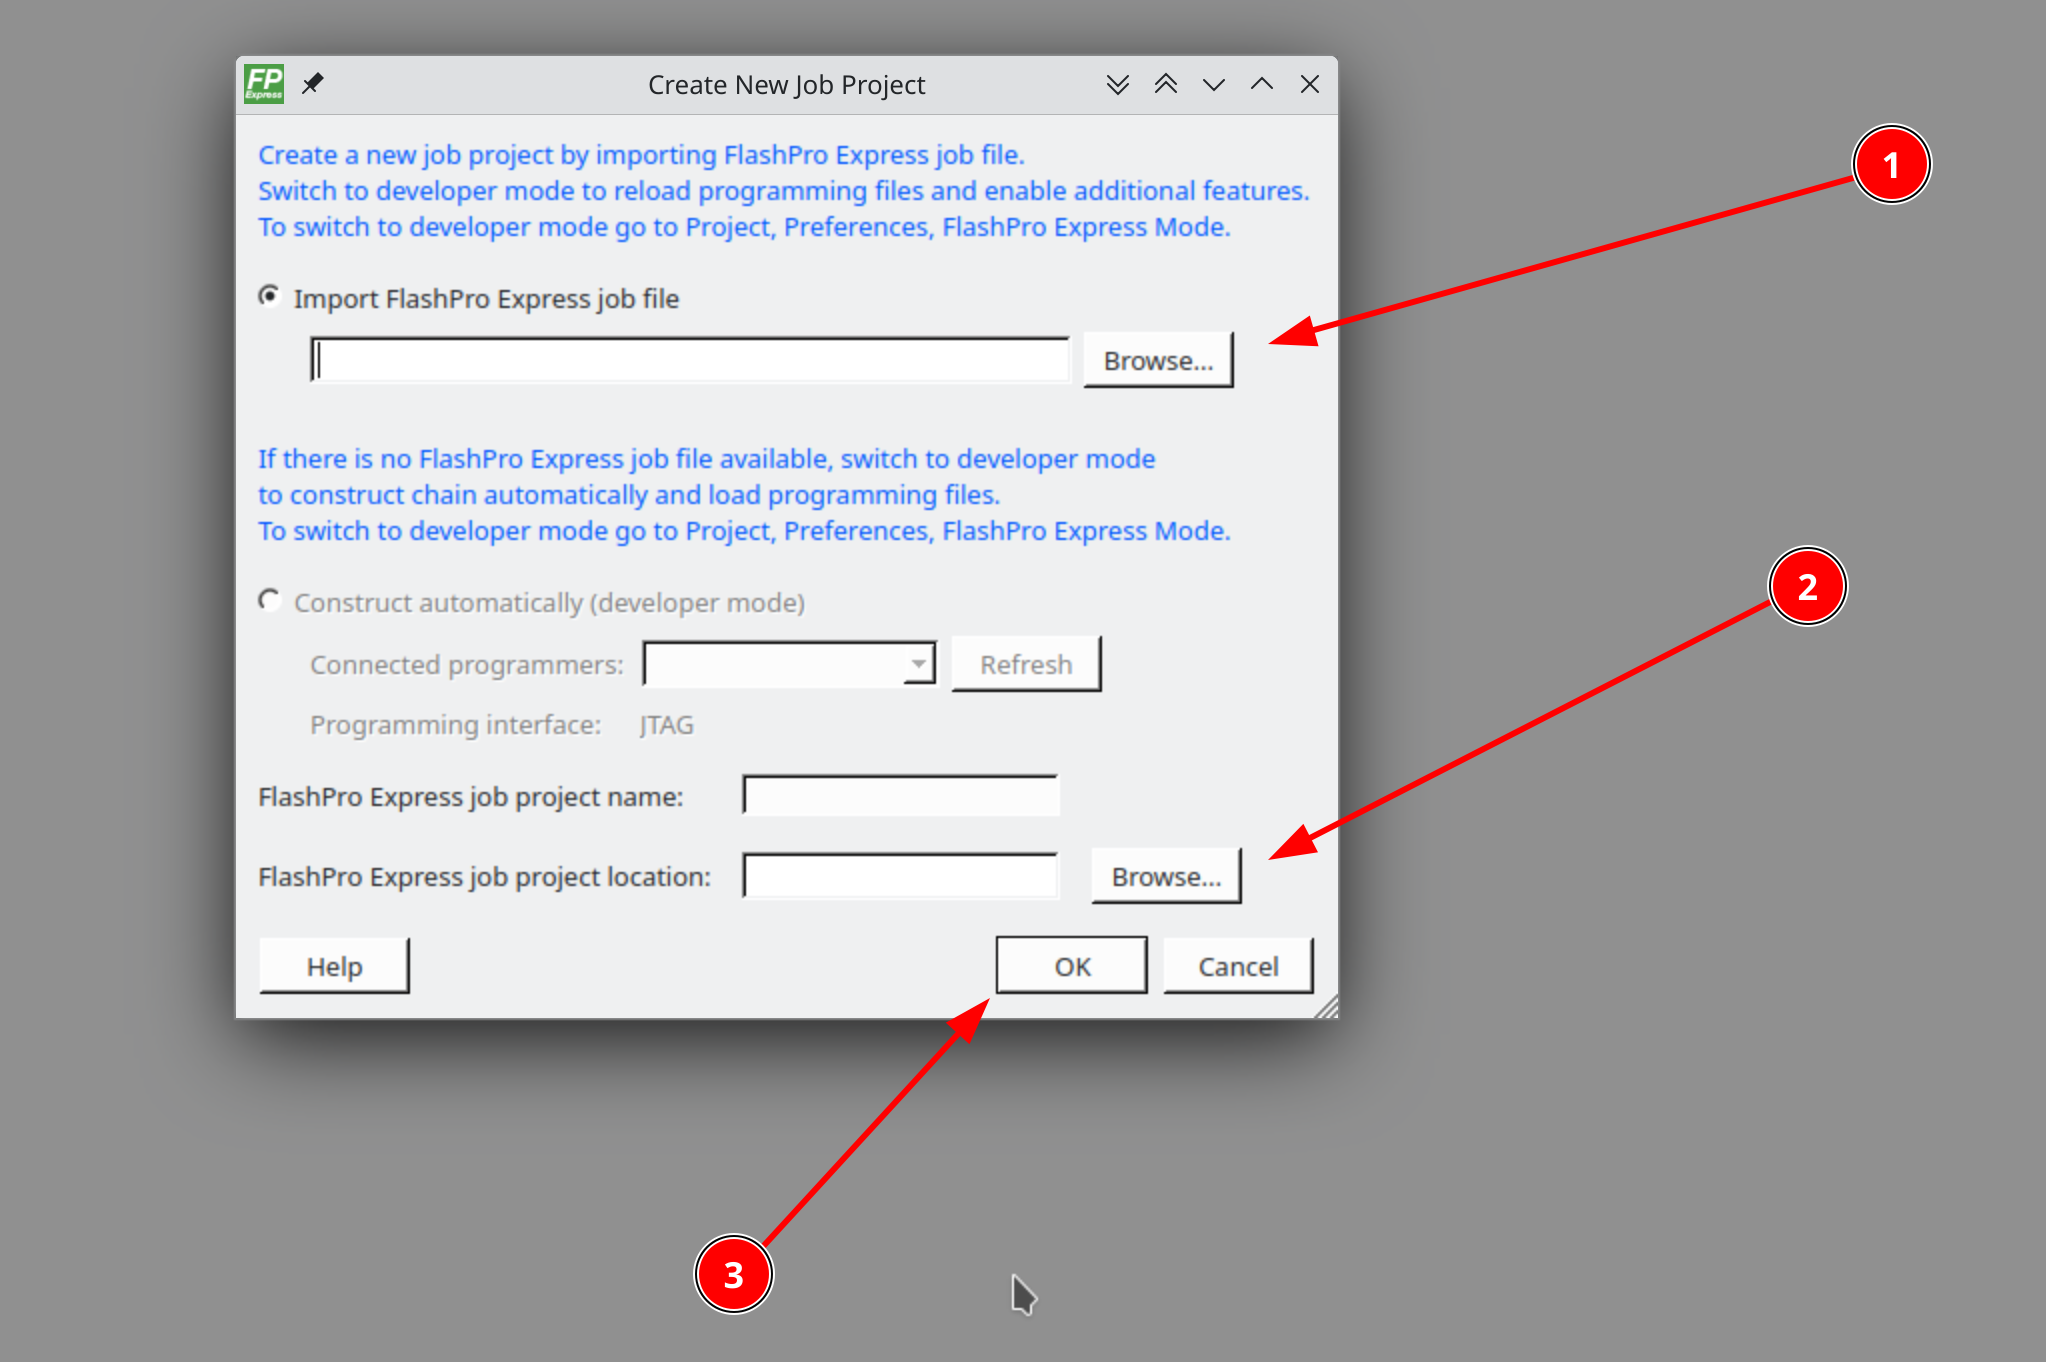
Fig. 586 FPExpress new project creation window#
Follow the steps below as annotated in the image above:
Click on browse (1) button to select the job file.
Click on browse (2) button to select the project location.
Click ok button to finish.
If your FlashPro5/6 is connected properly you’ll see the window shown below:
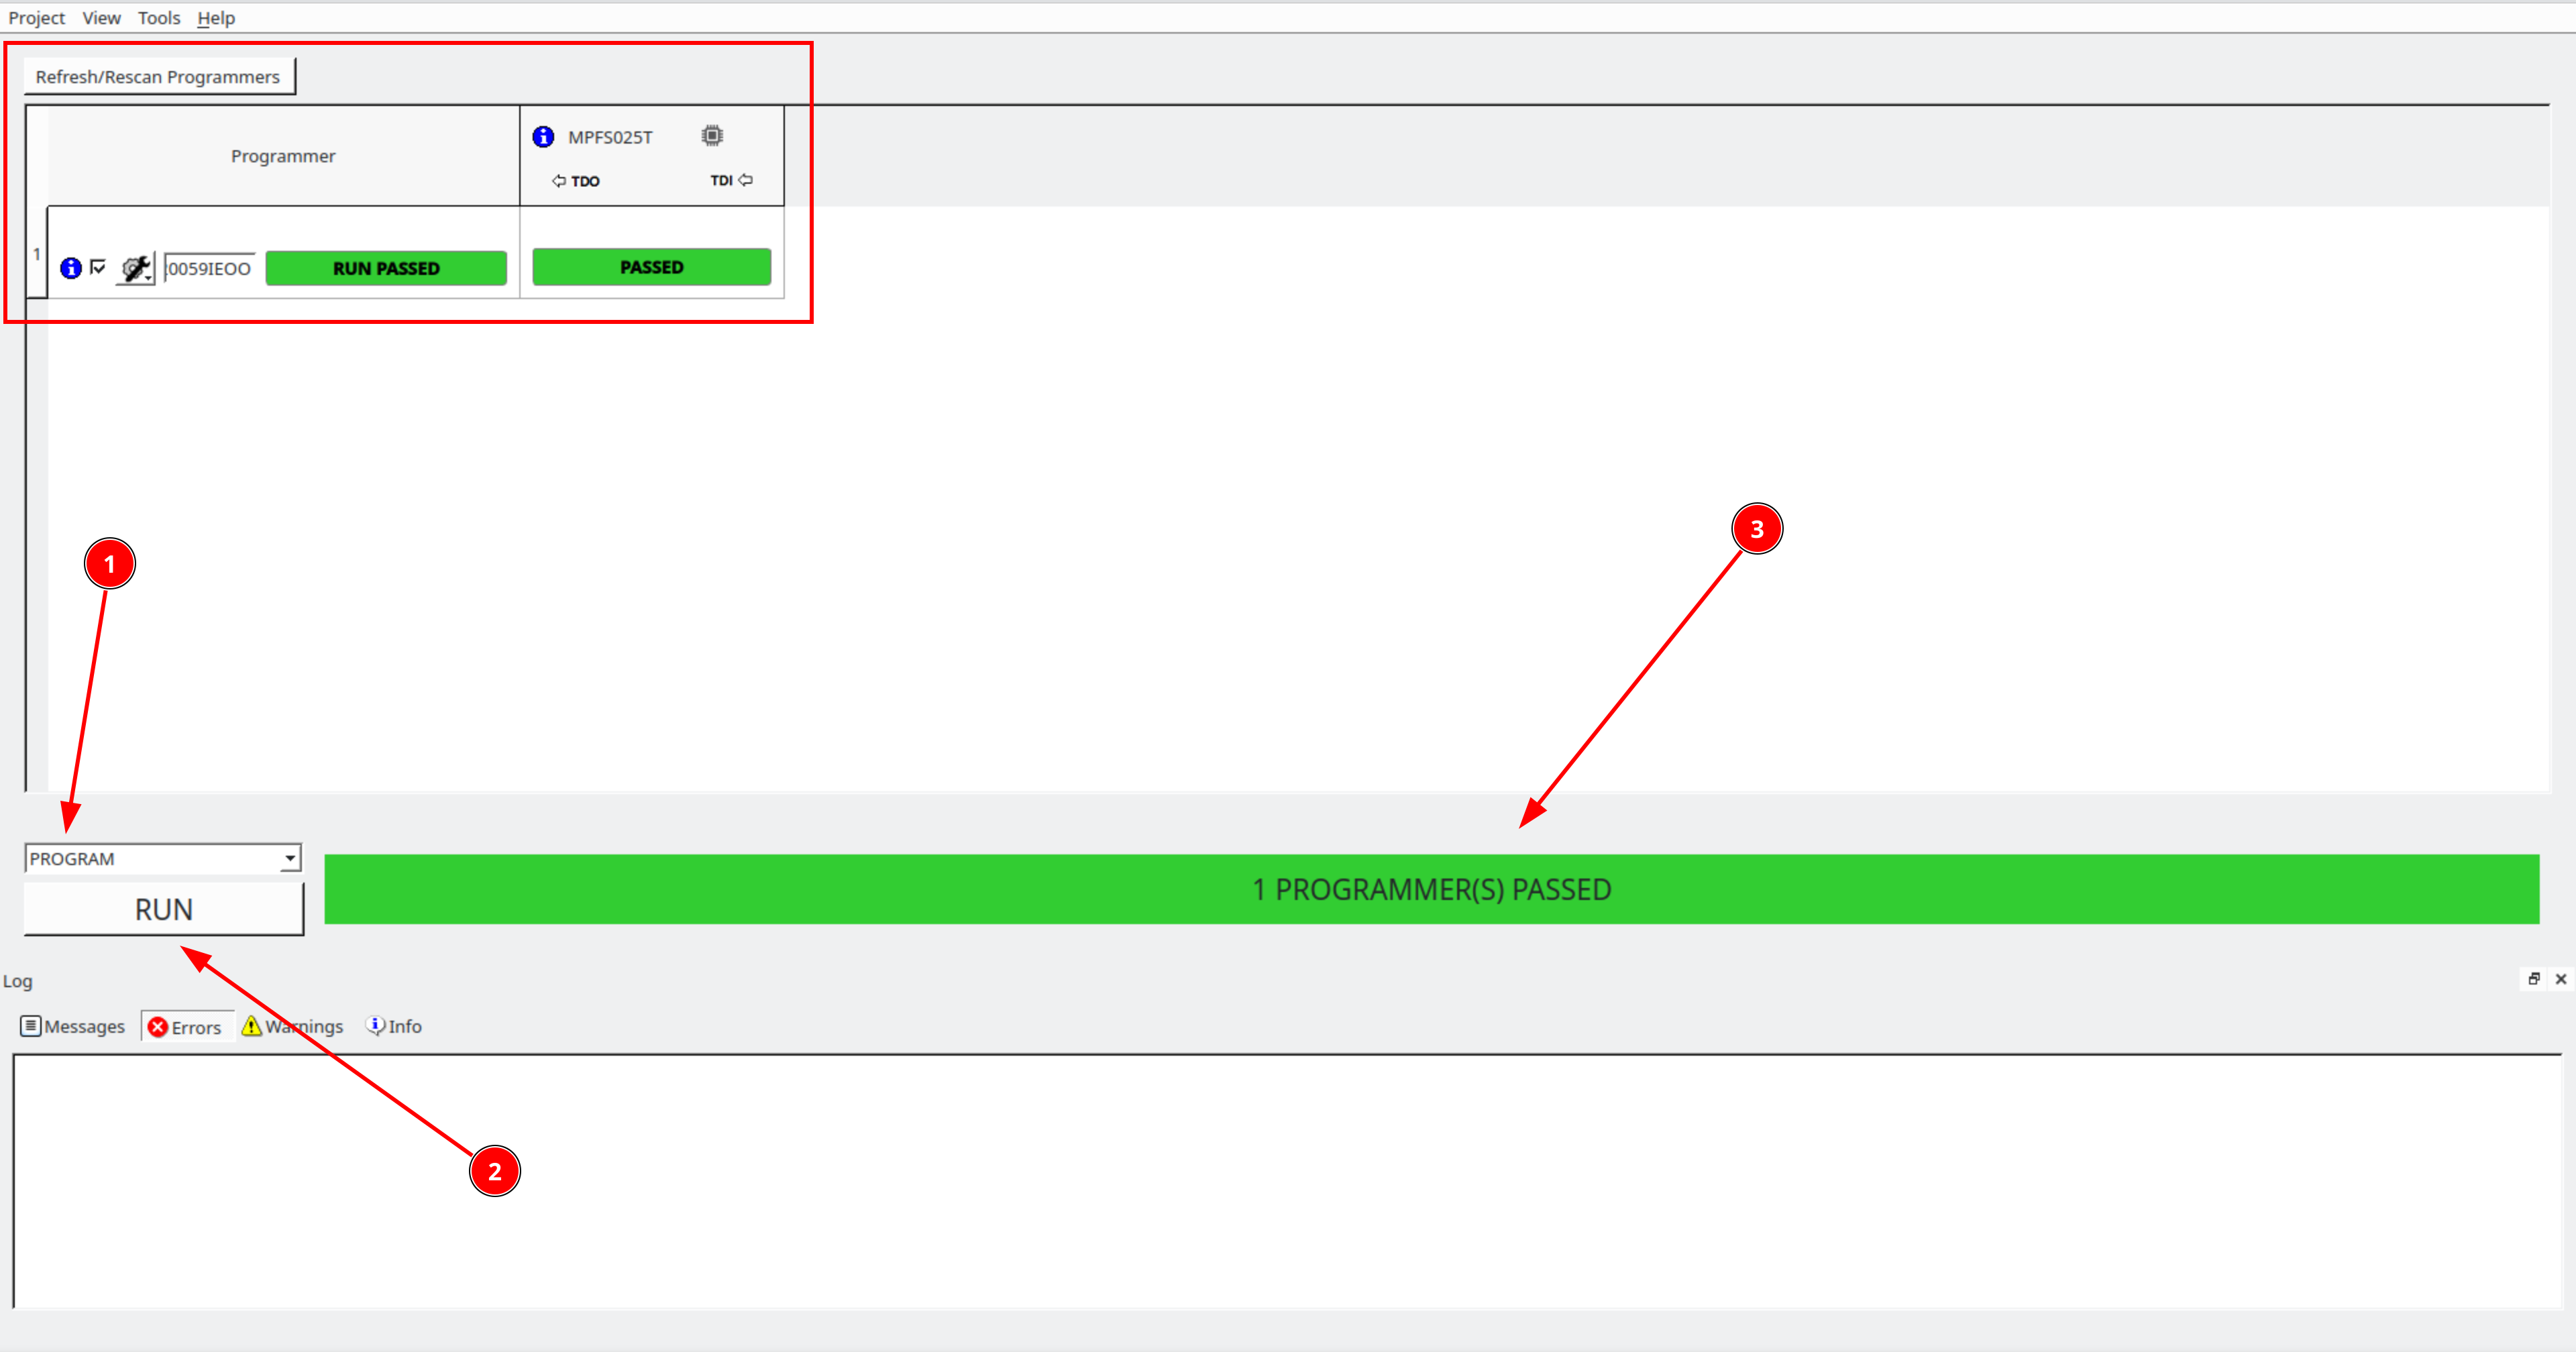
Fig. 587 FPExpress new project flash window#
Following the annotation in the image above:
From drop-down select
ProgramactionClick on
RUNbuttonShows the progress
If you see a lot of green color and the progress bar says
PASSED then well done you have successfully flashed
the gateware image on your BeagleV-Fire board.
Flashing eMMC#
Connect to BeagleV-Fire UART debug port using a 3.3v USB to UART bridge.
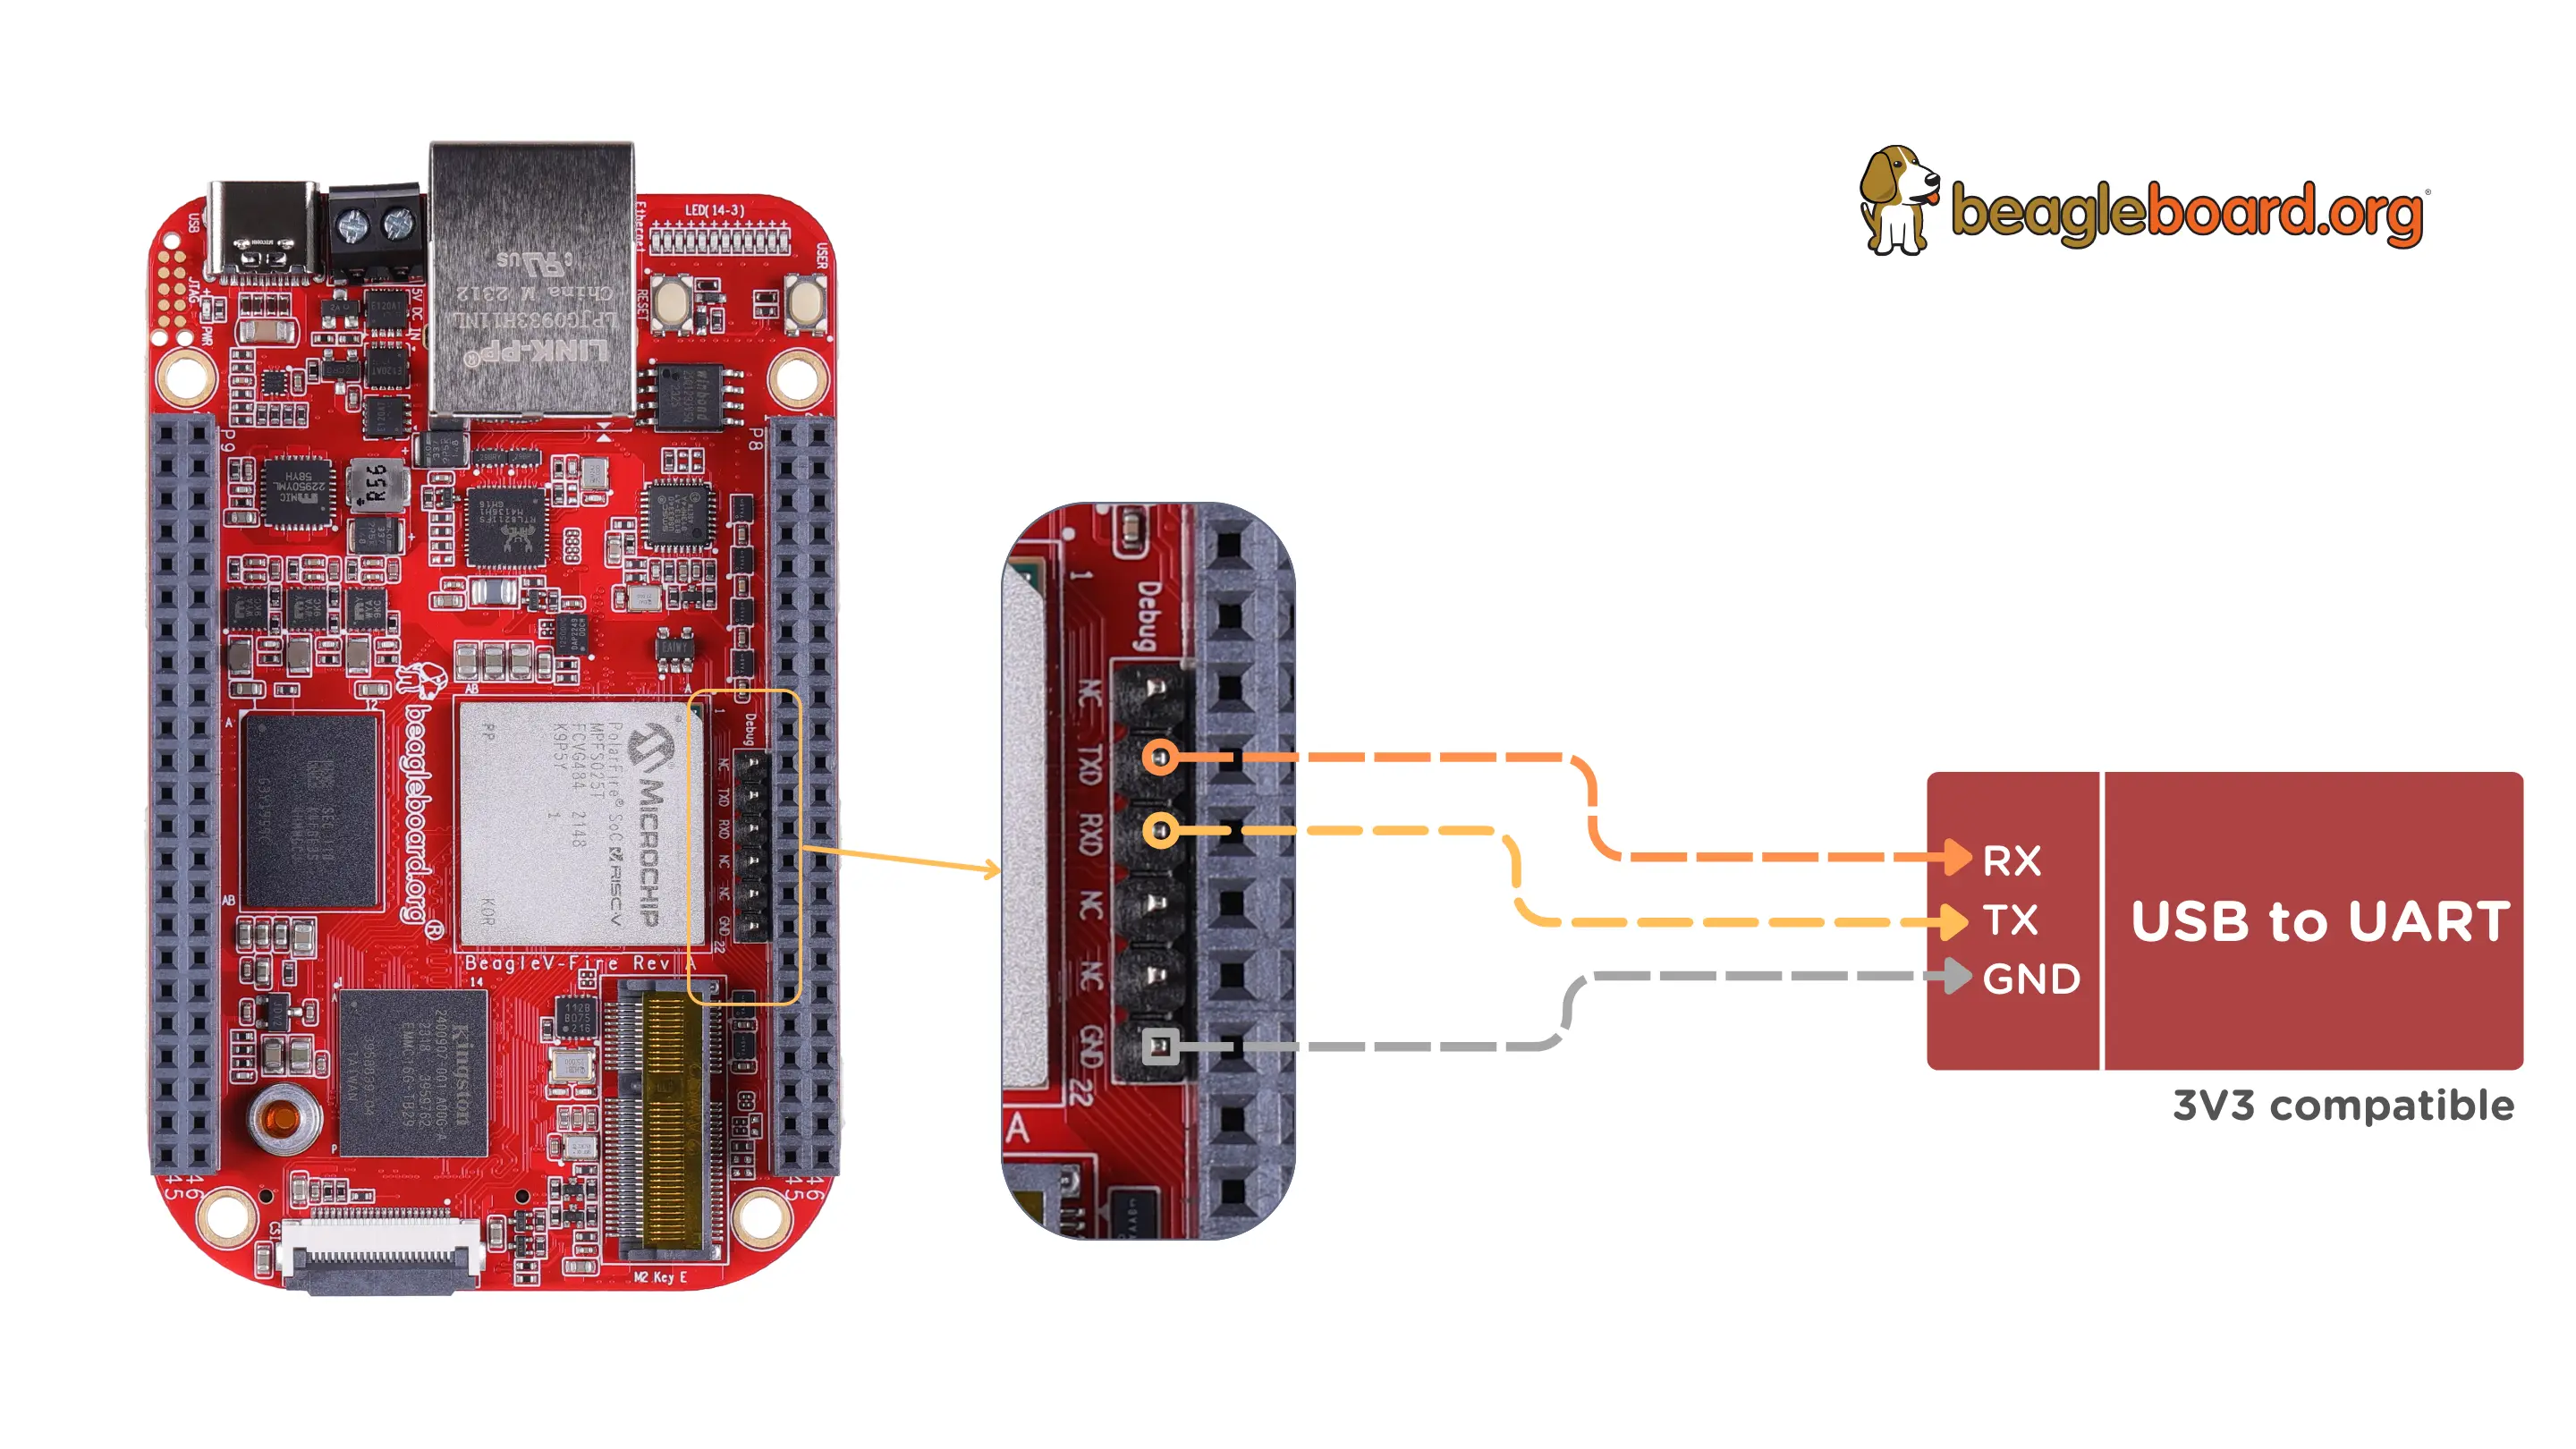
Fig. 588 UART debug connection#
Now you can run tio <port> -b 115200 in a terminal window to access
the UART debug port connection. Once you are connected properly you can
press the Reset button which will show you a progress bar like
in the

Fig. 589 BeagleV-Fire booting HSS with progress bar#
Once you see that progress bar on your screen you can start pressing any
button (0-9/a-z) which will stop the board from fully booting and you’ll be
able to access Hart Software Services (HSS) prompt. BeagleV-Fire’s eMMC content is
written by the Hart Software Services (HSS) using the usbdmsc command. The
HSS usbdmsc command exposes the eMMC as a USB mass storage device USB type C connector.
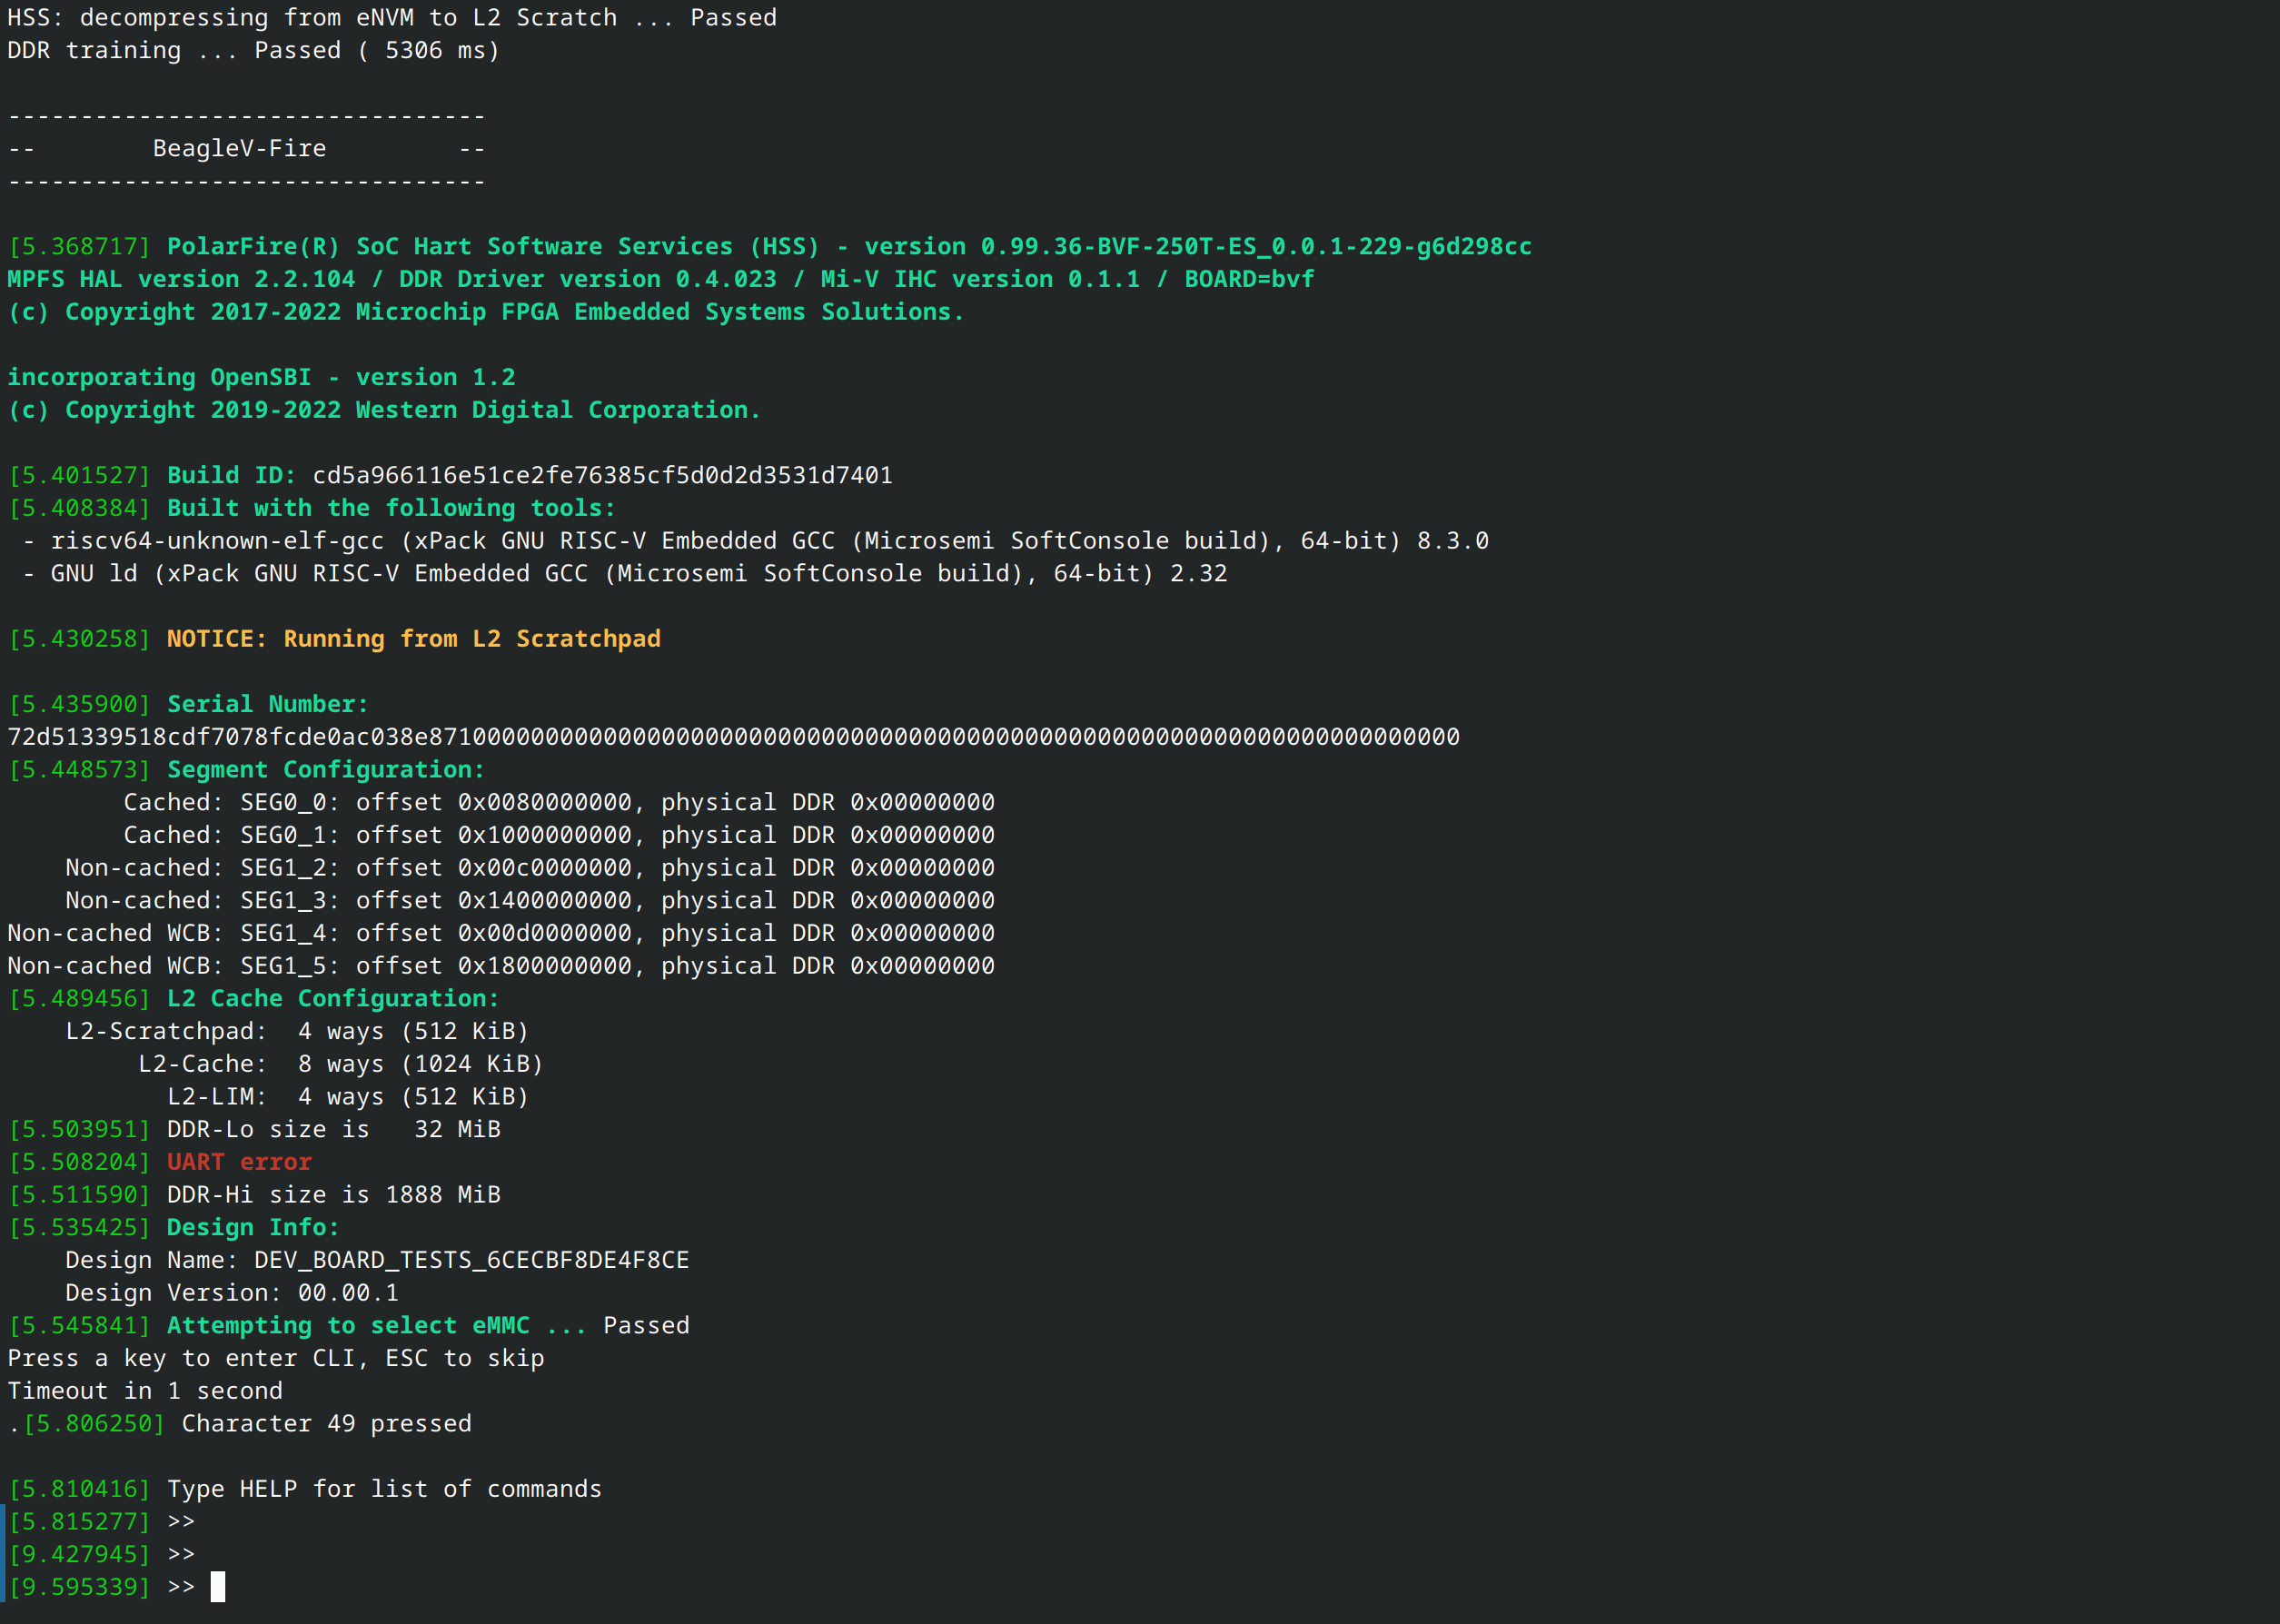
Fig. 590 BeagleV-Fire boot messages with HSS prompt access#
Once you see >> you can execute the commands below:
>> mmc>> usbdmsc

Fig. 591 HSS commands to show eMMC as mass storage#
After executing the commands above your BeagleV-Fire’s eMMC will be exposed as a mass storage device like shown in the image below:
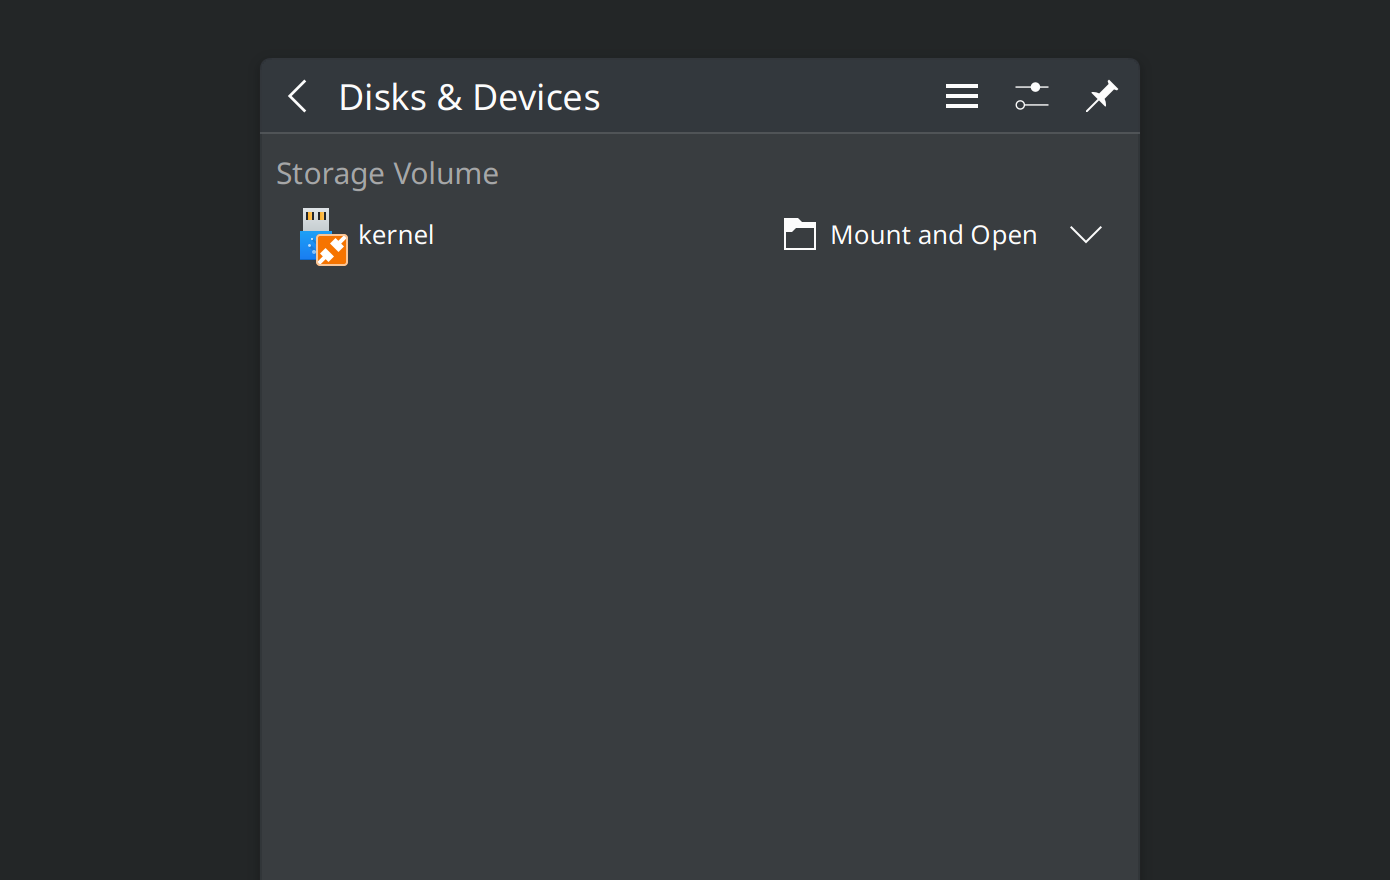
Fig. 592 BeagleV-Fire eMMC as mass storage#
Once your board is exposed as a mass storage device, you can proceed to flash the sdcard.img on
your BeagleV-Fire’s eMMC.
This document outlines two methods to flash from your local machine to BeagleV-Fire’s eMMC.
1. First method is to use Balena Etcher software. This software can be used to flash image in either Windows or Linux operating system.
Select the
sdcard.imgfile from your local drive storage.Click on select target.
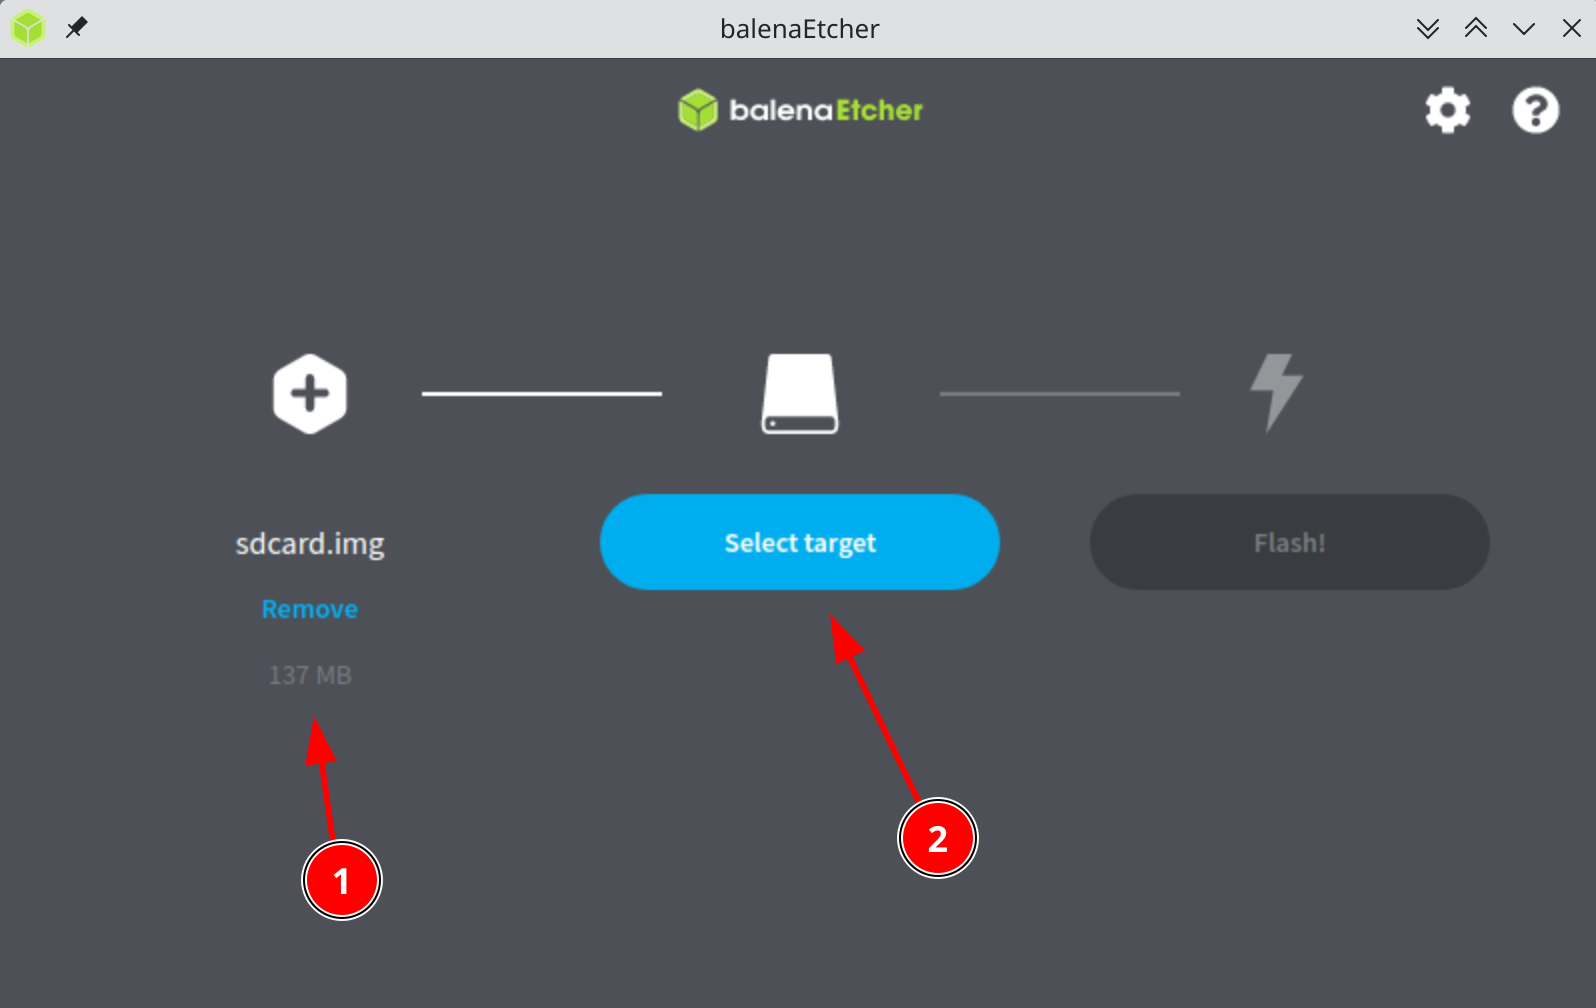
Fig. 593 Balena Etcher selecting image#
Select
MCC PolarFireSoC_msdas target.Click
Select(1)to proceed.
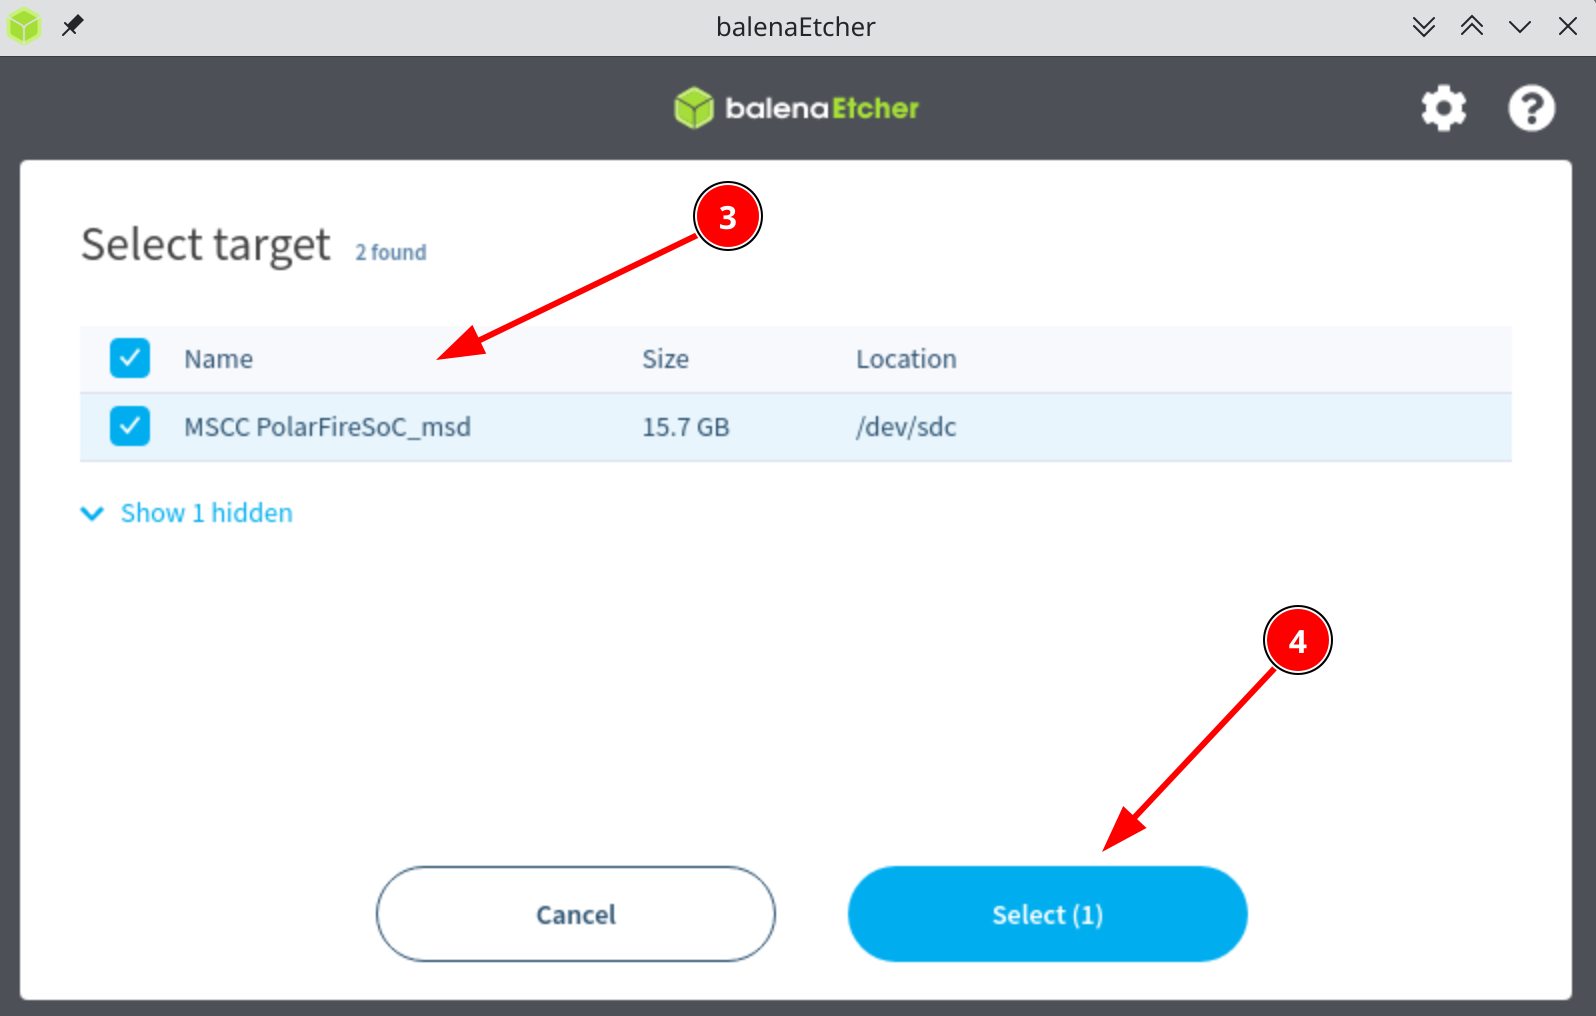
Fig. 594 Balena Etcher selecting target#
Click on
Flash!to flash thesdcard.imgon BeagleV-Fire eMMC storage.
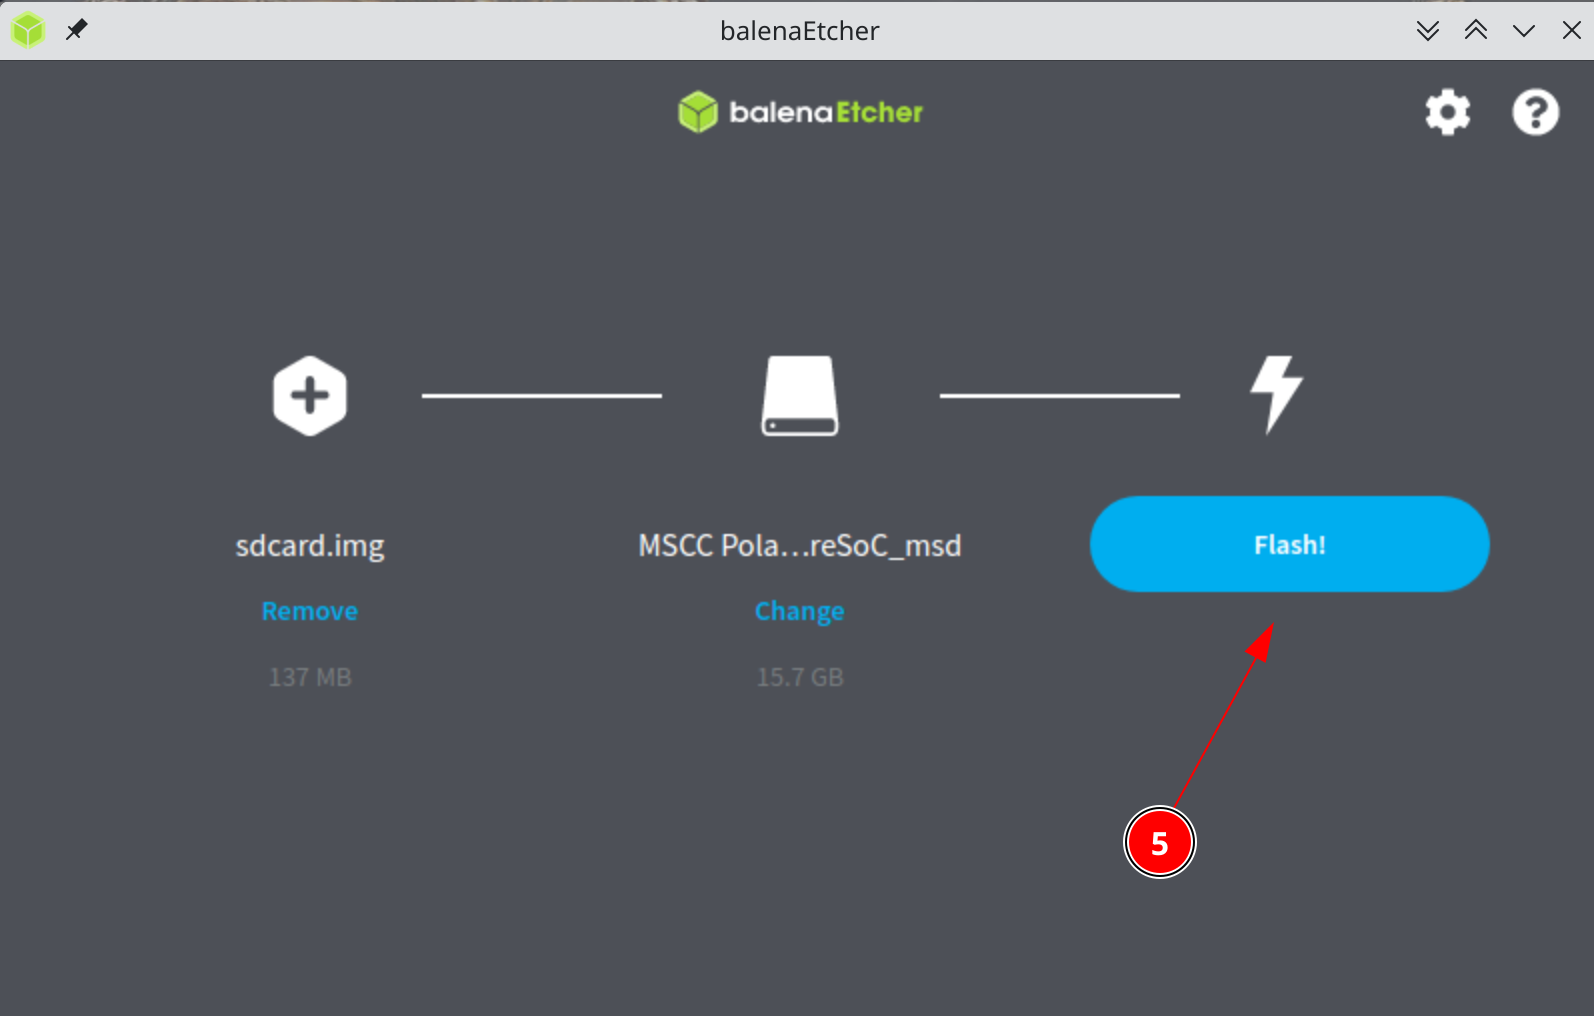
Fig. 595 Balena Etcher flashing image#
Second method is suitable for flashing the image using Linux machine via the command line.
sudo dd if=output/images/sdcard.img of=/dev/sdX bs=1M status=progress
Note
You need to replace /dev/sdX with the actual device name of your eMMC. Use tools like dmesg, lsblk, or GNOME Disks before and after exposing your device as a USB to identify the correct device name. Be very careful not to overwrite the wrong drive, as this action is irreversible.
Once the transfer is complete, type
CTRL+Cto disconnect your deviceFinally boot the new Linux image by typing
bootor reset your board
Congratulations! with that done you have fully updated BeagleV-Fire board with up to date gateware image on it’s PolarFire SoC’s FPGA Fabric and linux image on it’s eMMC storage.
