Building Linux for BeagleV-Fire using Buildroot#
Introduction#
Buildroot is a simple, efficient, and user-friendly tool for creating custom embedded Linux systems through cross-compilation.
This document provides a guide for building and flashing a Linux image on the BeagleV-Fire board with Buildroot. It outlines the process for compiling the image, writing image to the eMMC, and booting the new operating system.
Hardware requirements:#
BeagleV-Fire board
USB-C cable
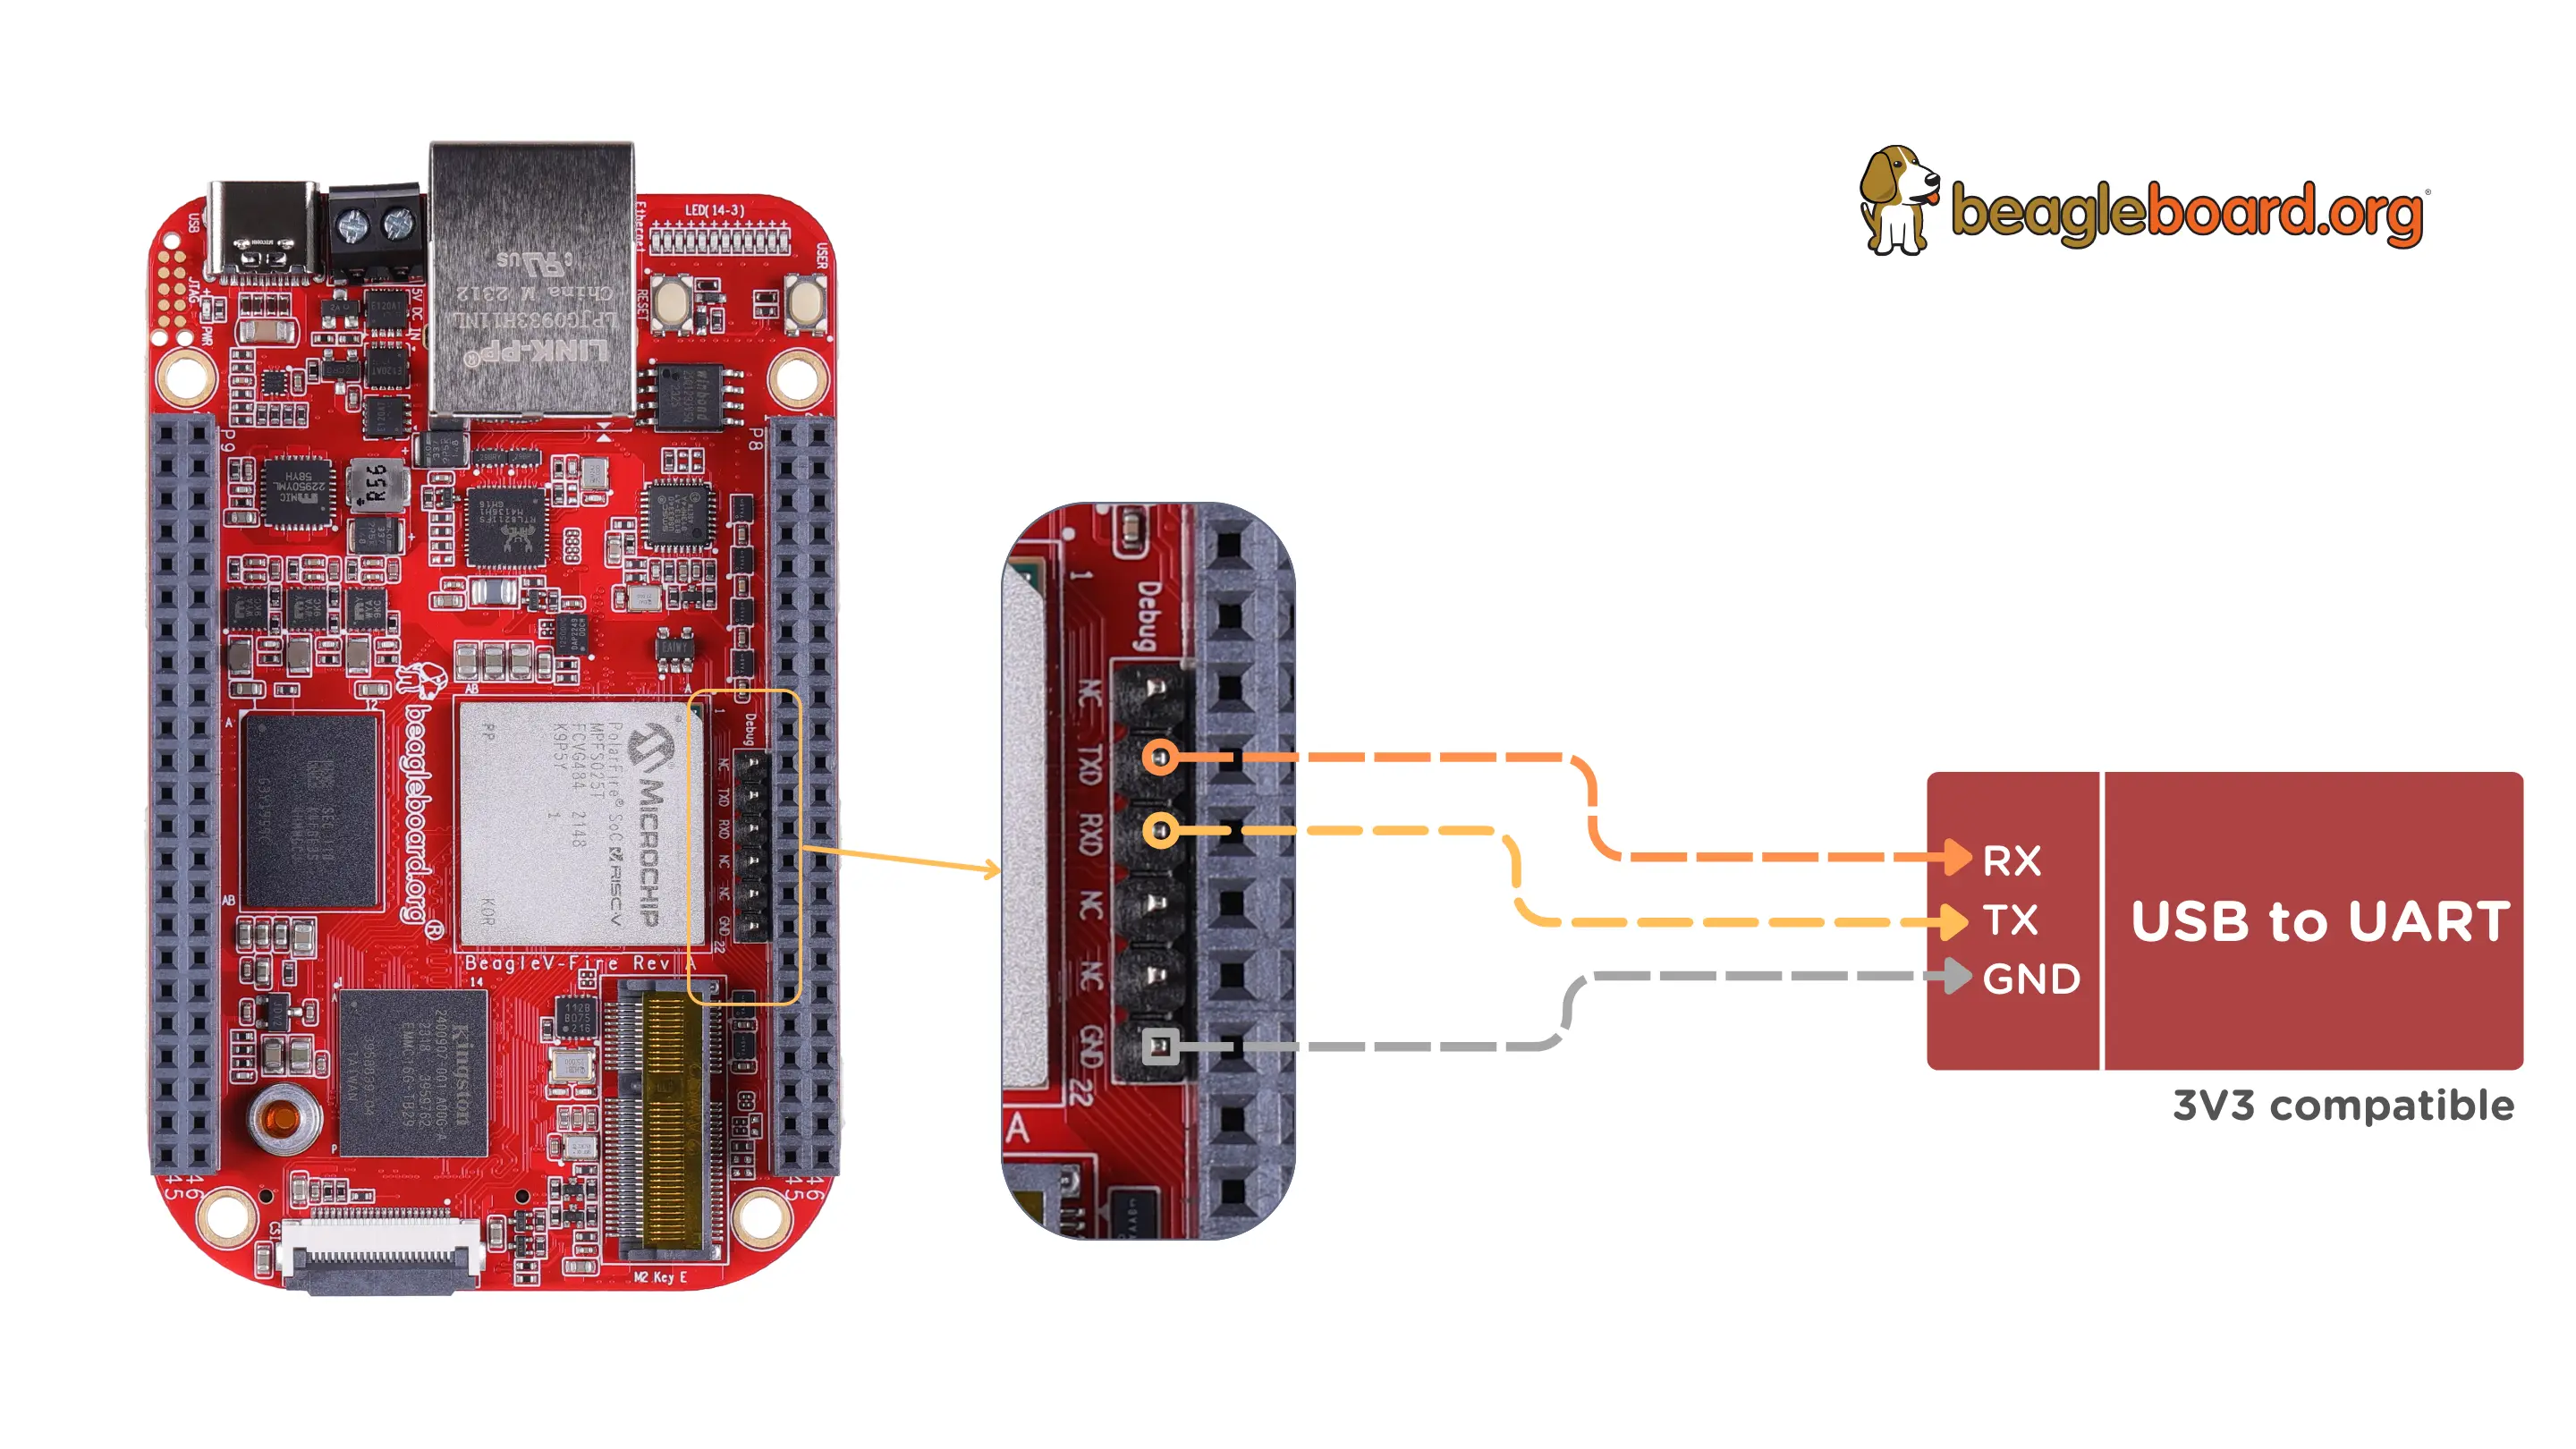
3.3v USB to UART bridge
Connect BeagleV-Fire UART debug port using 3.3v USB to UART bridge.
Software requirements:#
Download Buildroot repository from GitHub.
Start Building#
Note
The following steps are intended for a Linux operating system.
To build and flash Linux image using Buildroot,
Step 2. Configure the Build for BeagleV-Fire#
Configure the build by selecting the default board configuration:
make beaglev_fire_defconfig
Step 3. Customise the build (Optional)#
If you need to customize the build, use the following command:
make menuconfig
Step 4: Start the build process
make
Note
The build process can take 20-30 minutes for a clean build.
Step 5. Locate the build image#
Once the build is complete, the Linux image will be saved as sdcard.img in the /output/images/ directory. The directory structure will look something like this:
$ ls output/images/
boot.scr         boot.vfat.bmap   dts/             Image.gz         mpfs_icicle/     mpfs_icicle.its  rootfs.cpio      rootfs.tar       sdcard.img       sdcard.img.gz
boot.vfat        boot.vfat.gz     Image            microchip/       mpfs_icicle.itb  payload.bin      rootfs.cpio.gz   sdcard.bmap      sdcard.img.bmap  u-boot.bin
Step 6. Flash the Image to BeagleV-Fire’s eMMC#
Restart the board and halt the HSS (Hart Software Services) by pressing any key
In the HSS command line interface, type usbdmsc to expose the eMMC as a USB mass storage device using the USB-C connector.
If successful, a message saying “USB Host connected” will be displayed
Now, copy the image from local machine to BeagleV-Fire’s eMMC
sudo dd if=output/images/sdcard.img of=/dev/sdX bs=1M
Note
You need to replace /dev/sdX with the actual device name of your eMMC. Be very careful not to overwrite the wrong drive, as this action is irreversible.
Once the transfer is complete, type CTRL+C to disconnect your device
Finally boot the new Linux image by typing boot or reset your board
Detailed description of this step is mentioned in Flashing eMMC section.
