Quick Start Guide#
What’s included in the box?#
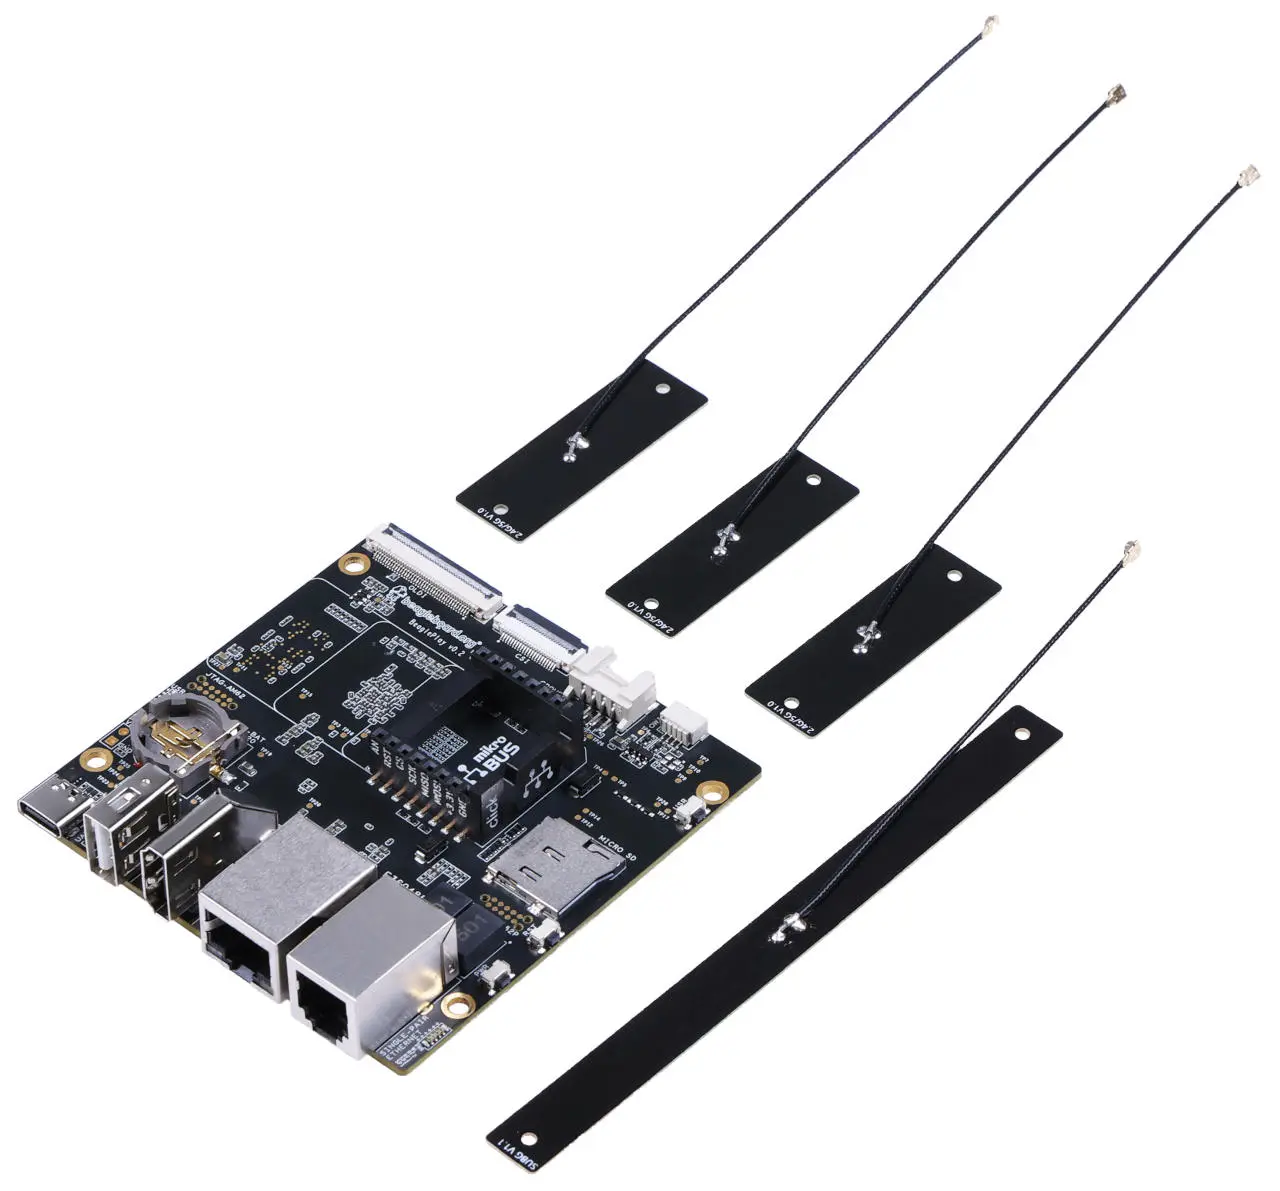
When you purchase a brand new BeaglePlay, In the box you’ll get:
One (1) sub-GHz antenna
Three (3) 2.4GHz/5GHz antennas
Plastic standoff hardware
Quick-start card
Important
Tip
For board files, 3D model, and more, you can checkout BeaglePlay repository on OpenBeagle.
Attaching antennas#
You can watch this video to see how to attach the antennas.
Tethering to PC#
Tip
Checkout Getting Started Guide for,
Updating to latest software.
Power and Boot.
Network connection.
Browsing to your Beagle.
Troubleshooting.
For tethering to your PC you’ll need a USB-C data cable.
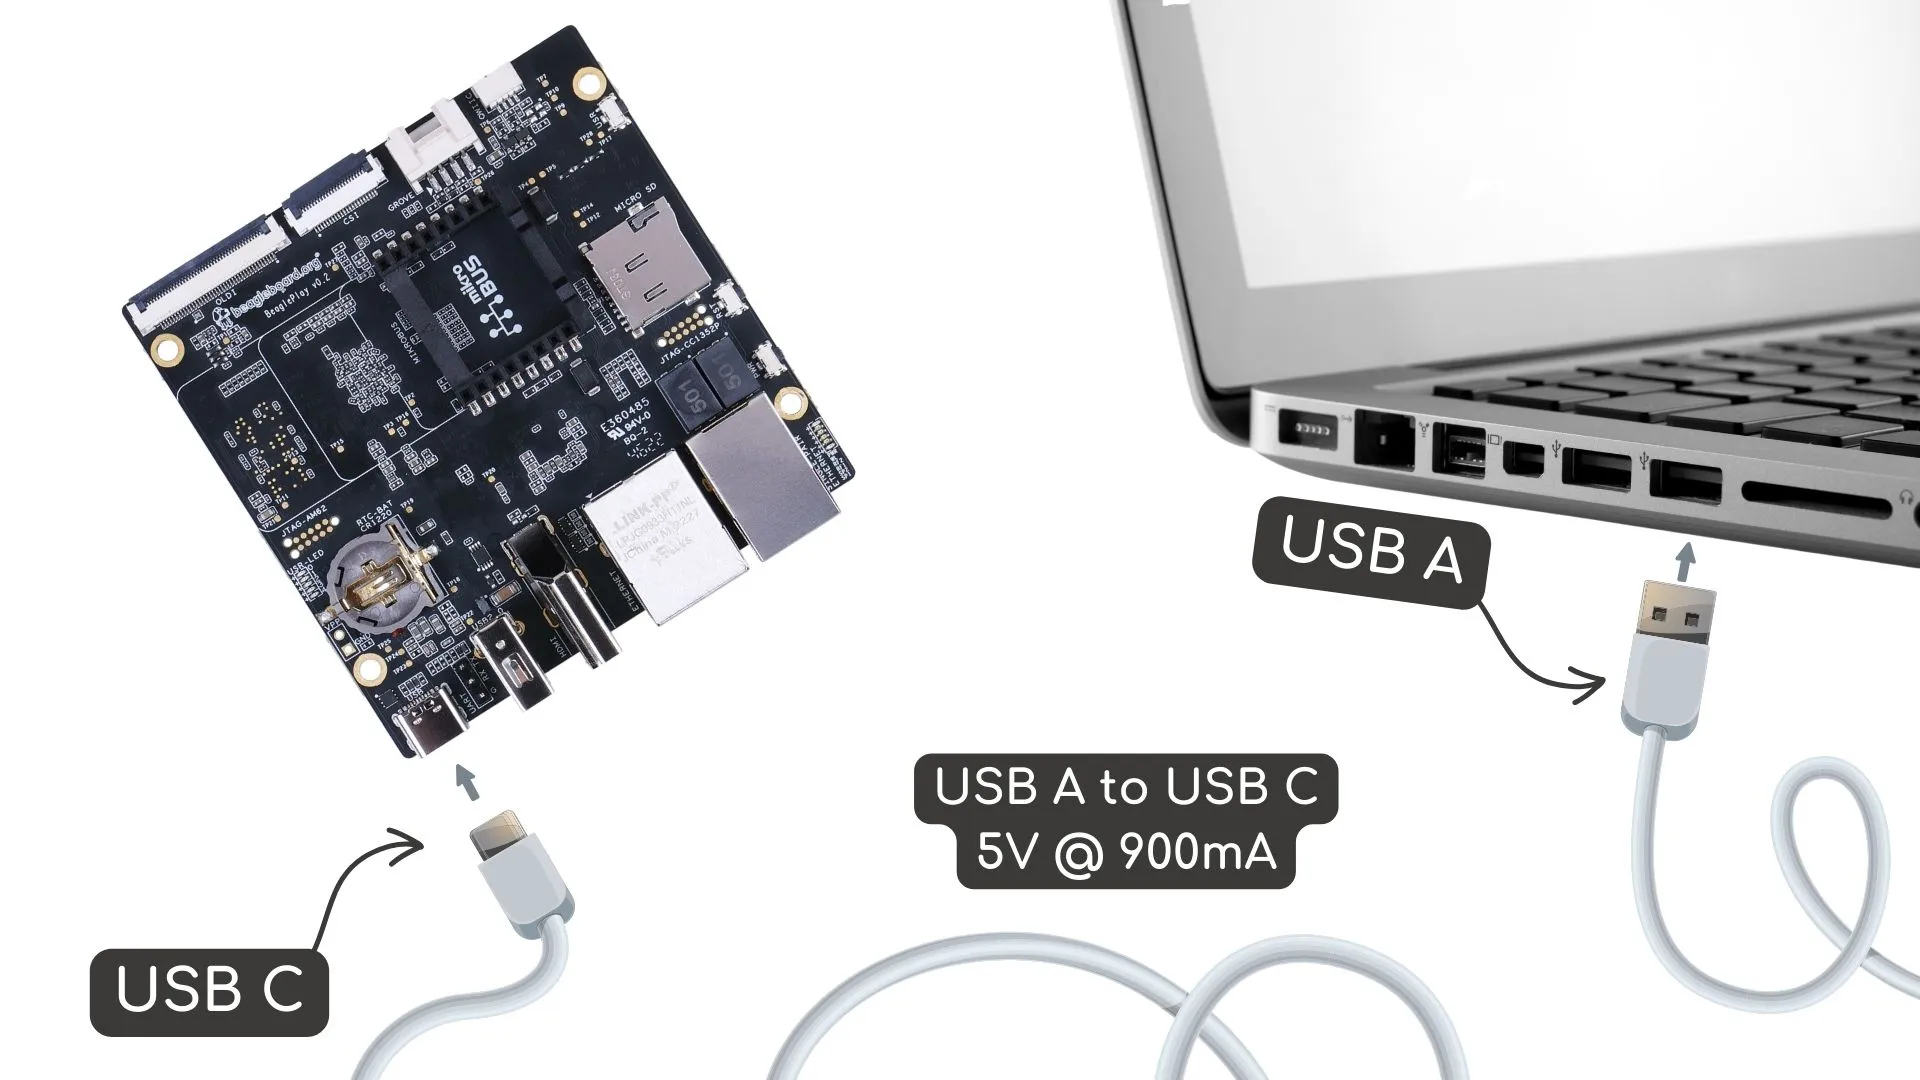
Fig. 159 Tethering BeaglePlay to PC#
Access VSCode#
You can access VSCode in two ways:
USB#
Once connected, you can browse to 192.168.7.2:3000 to access the VSCode IDE to browse documents and start programming your BeaglePlay!
Access Point#
By default BeaglePlay Access Point is enabled, You can connect to BeaglePlay-XXXX Access Point with the password BeaglePlay and then
browse to 192.168.7.2:3000 to access the VSCode IDE.
Note
You may get a warning about an invalid or self-signed certificate. This is a limitation of not having a public URL for your board. If you have any questions about this, please as on https://forum.beagleboard.org/tag/play.
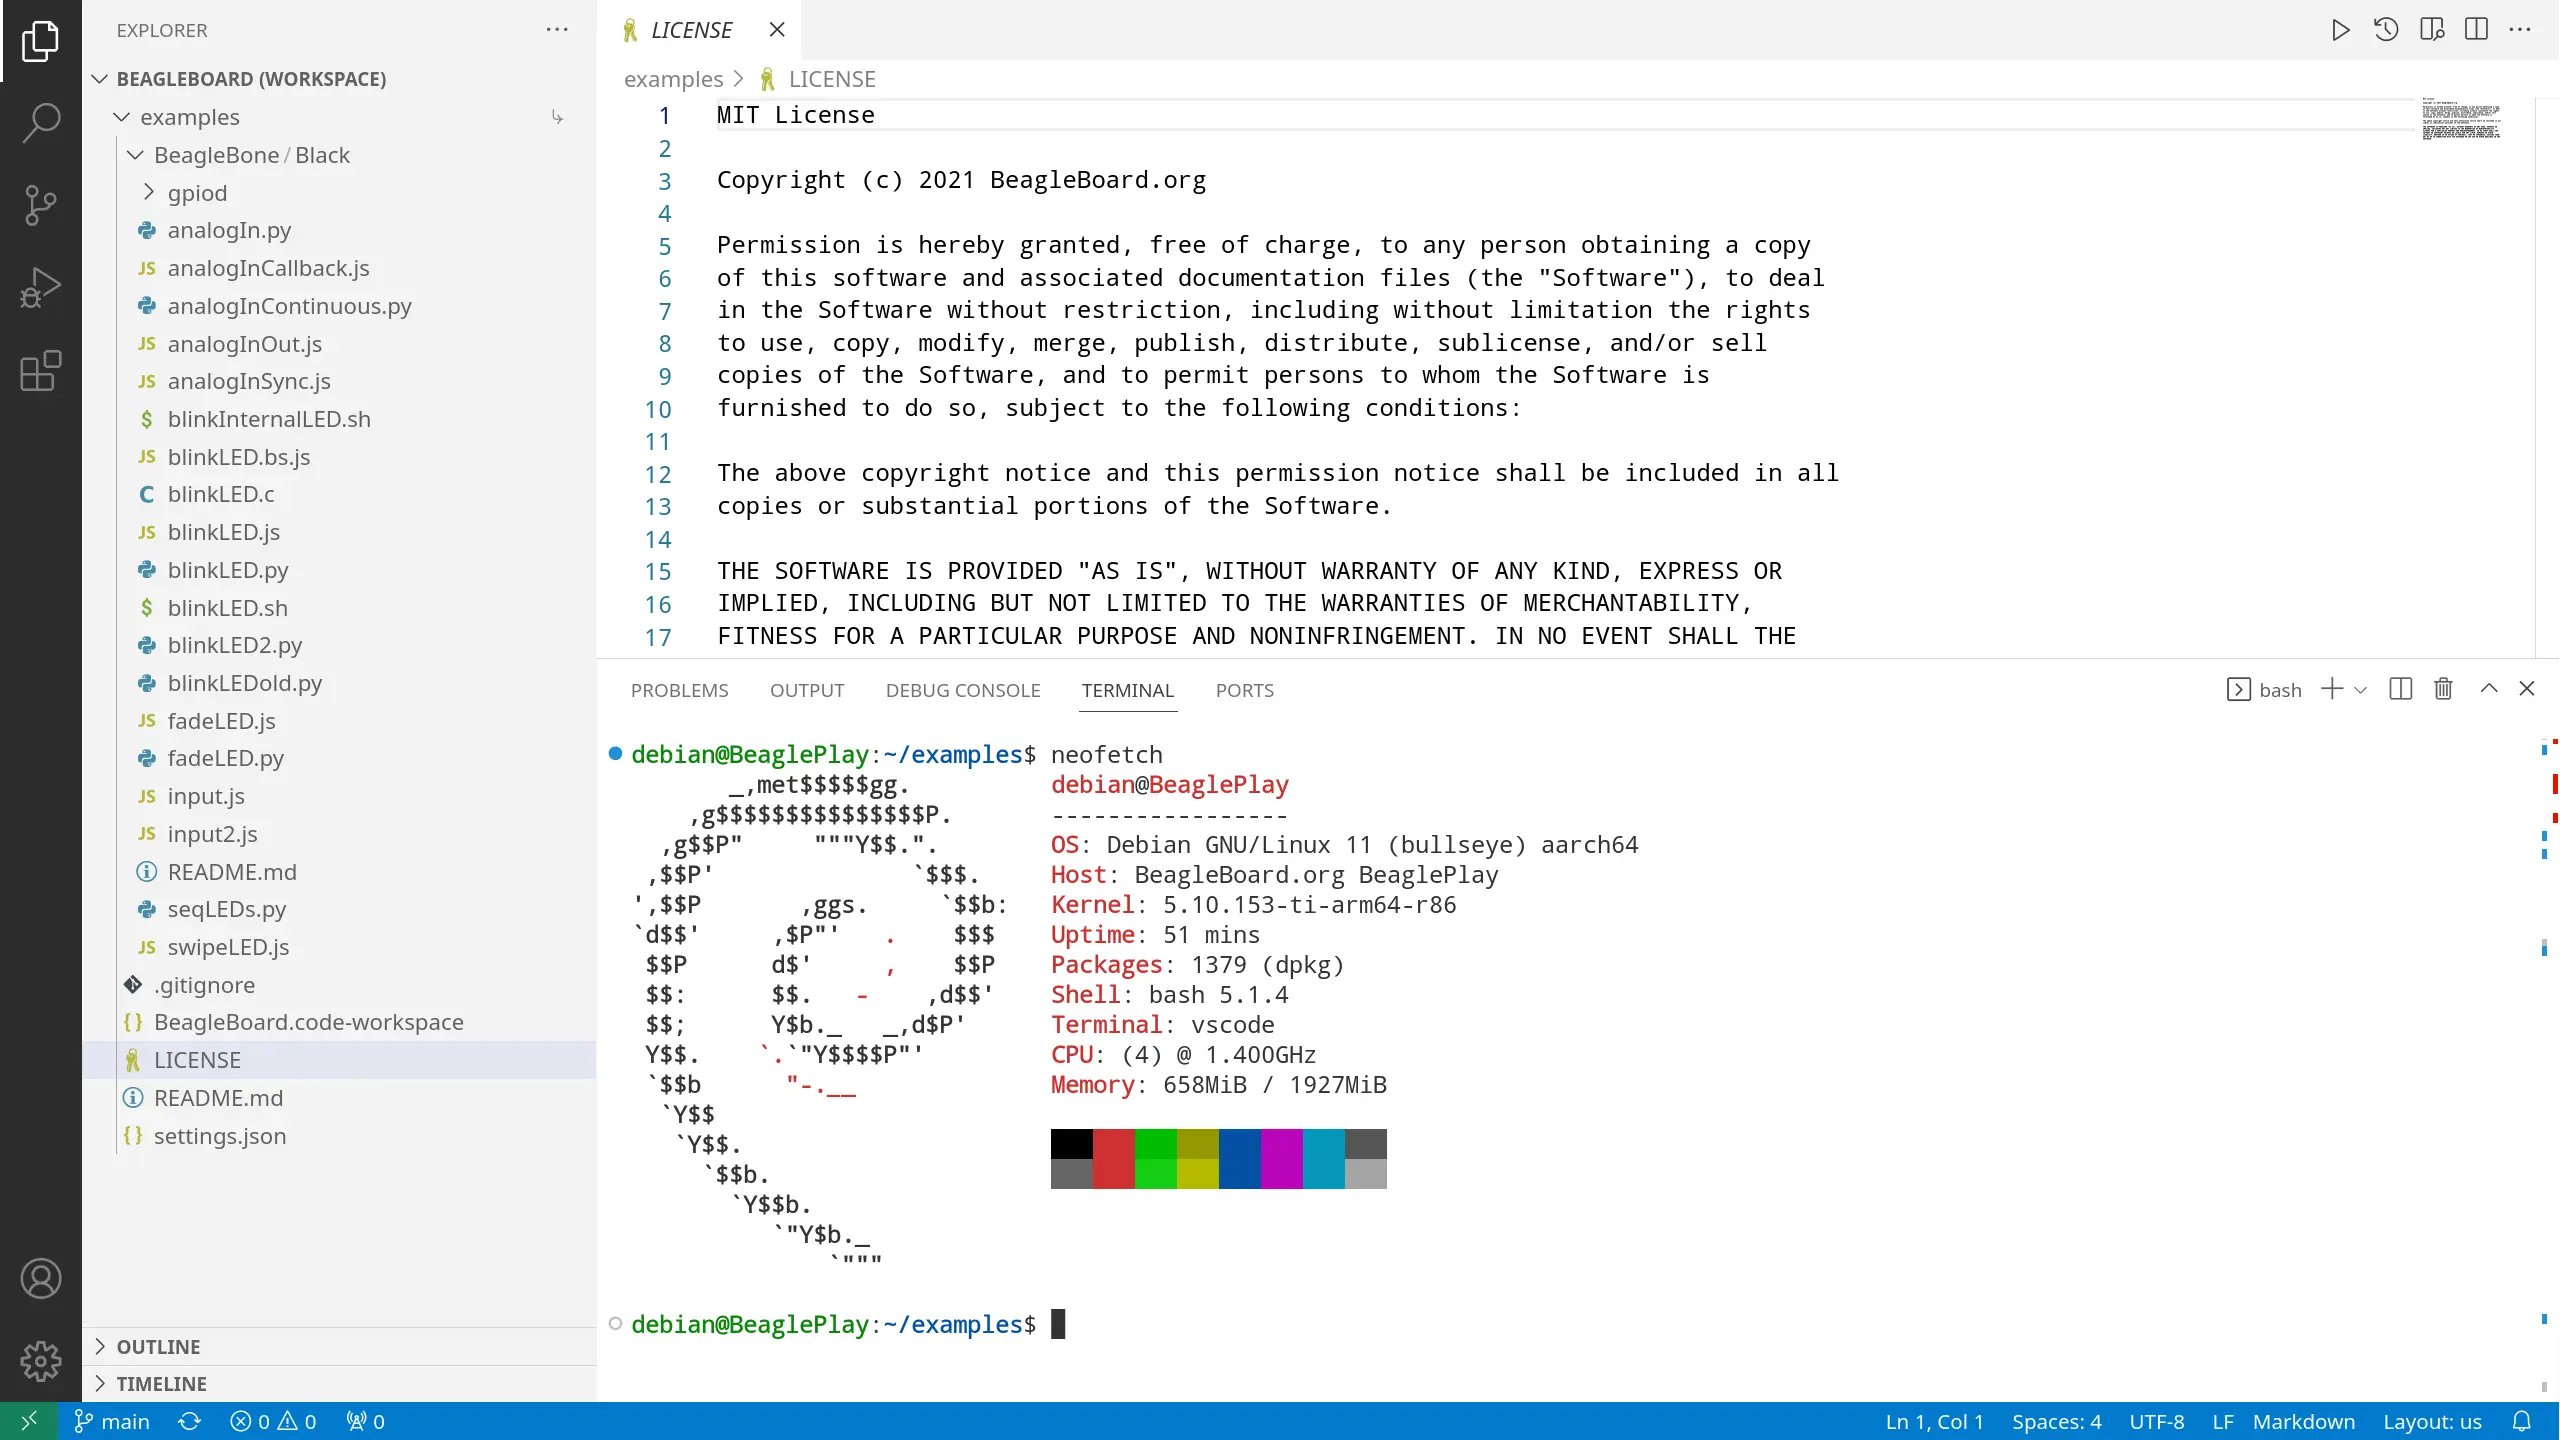
Fig. 160 BeaglePlay VSCode IDE (192.168.7.2:3000)#
Tip
For more Wifi and Access Point related info go to Connect WiFi
